Vetware: Quick start guide
This manual describes how to make a quick start with Vetware – on your Solis-workspace (UU computer).
Vetware is an application used by the faculty of veterinary medicine.
-
Step 1
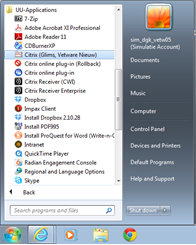
Om Vetware te starten, doe je het volgende:
- Klik op de startknop onderaan
- Ga naar “All programs”
- Ga naar “UU-Applications”
- Klik op Citrix (Glims, Vetware Nieuw)
Staat dit niet in je startmenu of kun je het niet vinden? Neem dan contact op met de ICT Servicedesk.
-
Step 2
To start Vetware, open the following program:
- Click the start button
- Click “All programs”
- Click “UU-Applications”
- Click Citrix (Glims, Vetware Nieuw)
Is this not in your start menu or can’t you find the program? Please contact the IT Service Desk.
-
Step 3
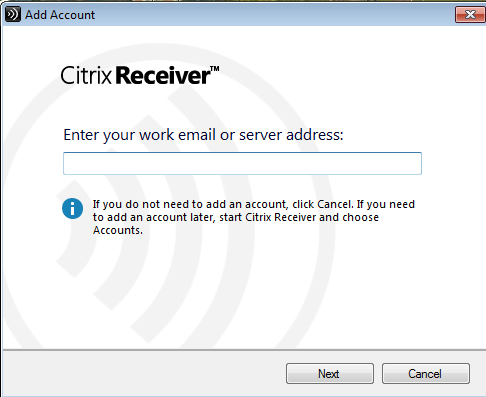
Your default browser will be opened. In case you see the Window here on the left, click Cancel.
-
Step 4
Next, the log on screen of Citrix will be shown. Log on using your Solis-id and Solis-password.
(Your Solis-id and password are the same credentials you use when logging on to a PC or your email).
-
Step 5
Click the folder Vetware.
-
Step 6
- Select your language (EN for English)
- Select your display size (widescreen for the newer 16:9 displays)
-
Step 7
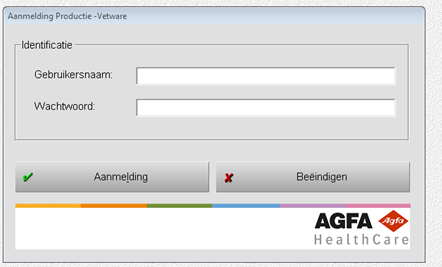
Log on using your Vetware account.
-
Do you receive this error message “the location has not been defined in the system form” (de locatie is nog niet in het systeemformulier gedefinieerd)?

If you are working on a standard UU computer (Solis-workspace) write down the UU-number of your PC and printer(s) that you want to use and contact the IT Service Desk. You can find these UU-numbers on a gray assit tag on the device itself.
-
On older screens (4:3 size) you can experience that the Windows task bar is not visible anymore.
In that case, you might want to hide the Windows taskbar automatically. Follow the steps below to do so.
-
Step 8
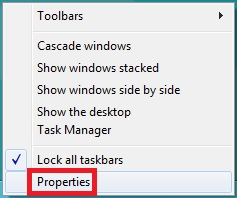
Click your right mouse button while pointing the mouse to the task bar. Select Properties.
-
Step 9
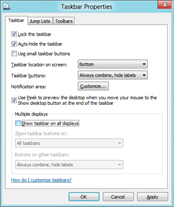
Check the box Auto-hide task bar (on top) and click OK.
Now, the task bar is not shown anymore by default. When you want to use or see the taskbar again, simply move the mouse all the way down to te screen (to the position where te taskbar normally would be). The taskbar will appear.
Last modified: 6/09/2019


