Outlook: book a meeting room
This manual describes how to book a meeting room in Outlook
This manual uses Outlook 365. The steps and screenshots may differ if you use a different version.
-
Step 1
Start Outlook.
-
Step 2
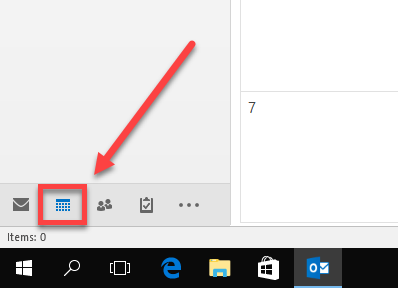
Open the Calendar view
-
Step 3
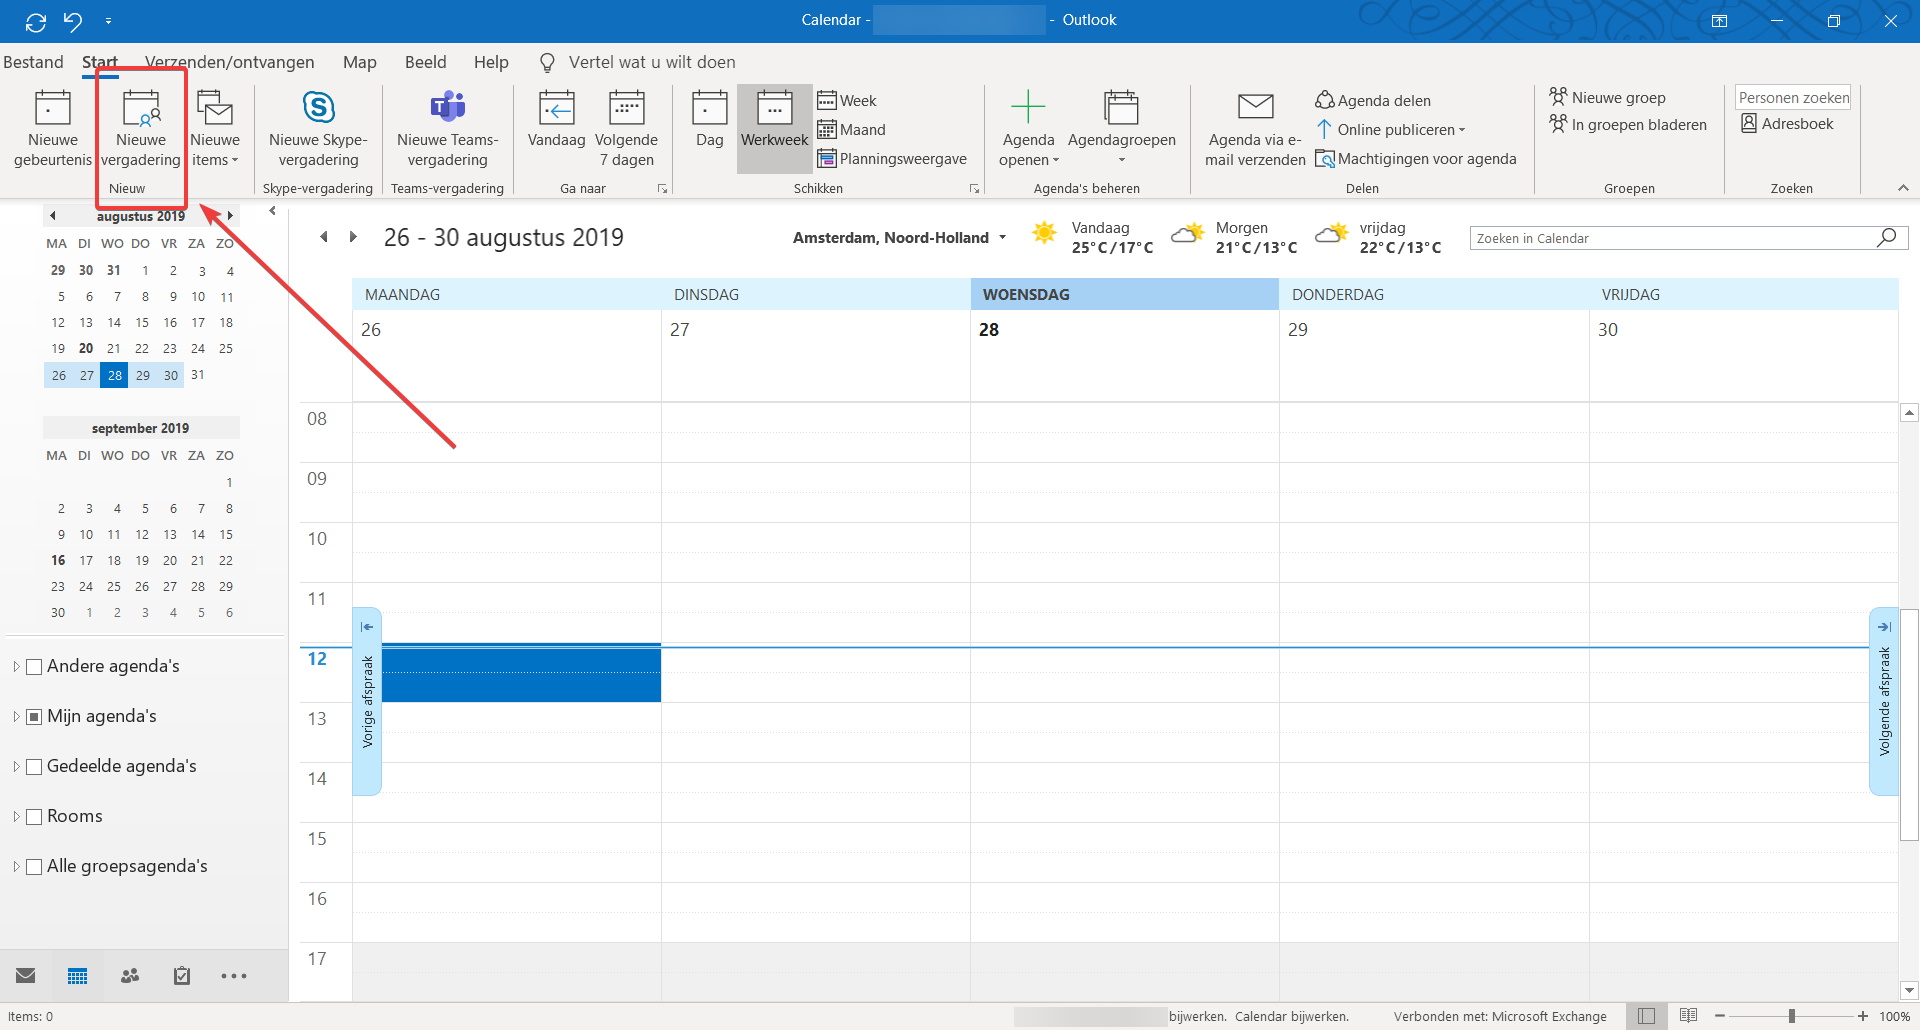
Navigate to the time and date when you want to book the room.
- Select the preferred time slot
- Click New meeting
-
Step 4
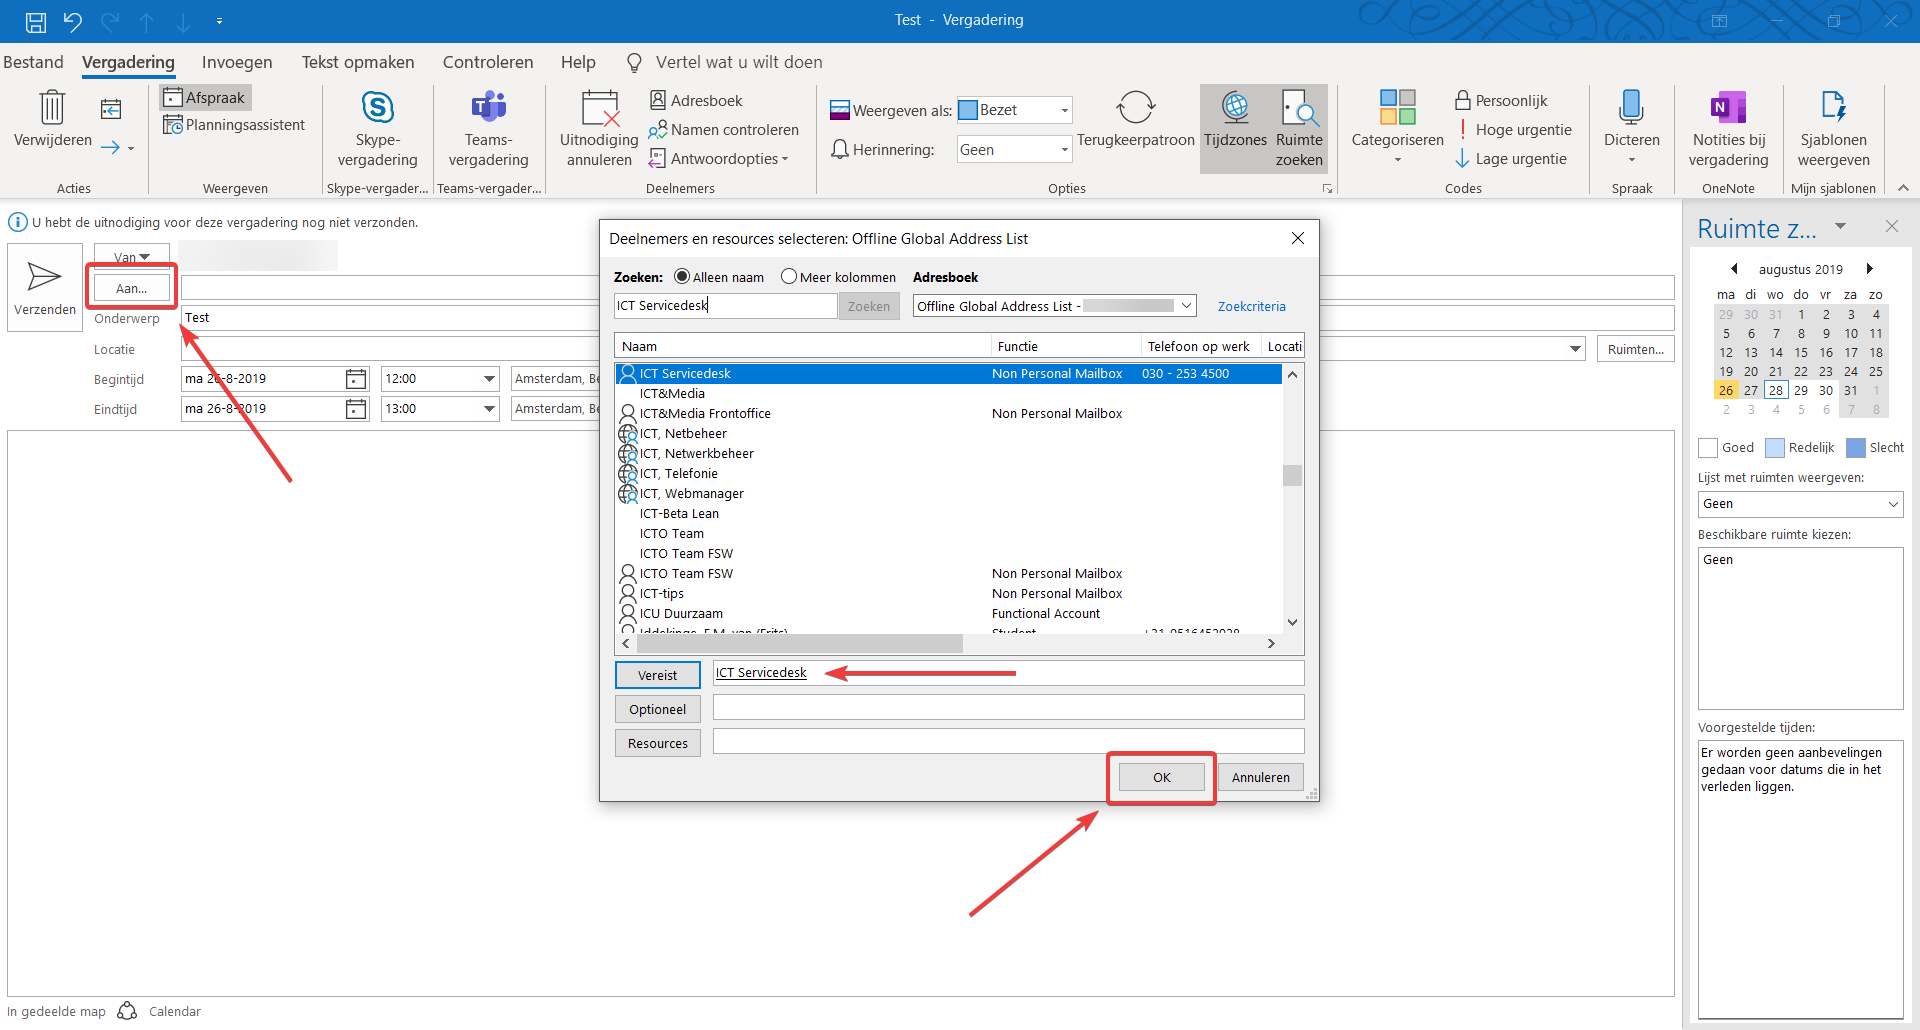
Enter a subject for the meeting and add the invitees for the meeting.
- You can enter the names or mail addresses for colleagues directly, or use the address book by clicking To….
- Find the person(s) you are looking for by searching for their last name.
- Dubbel click the person you want to invite
- Click OK when done
-
Step 5
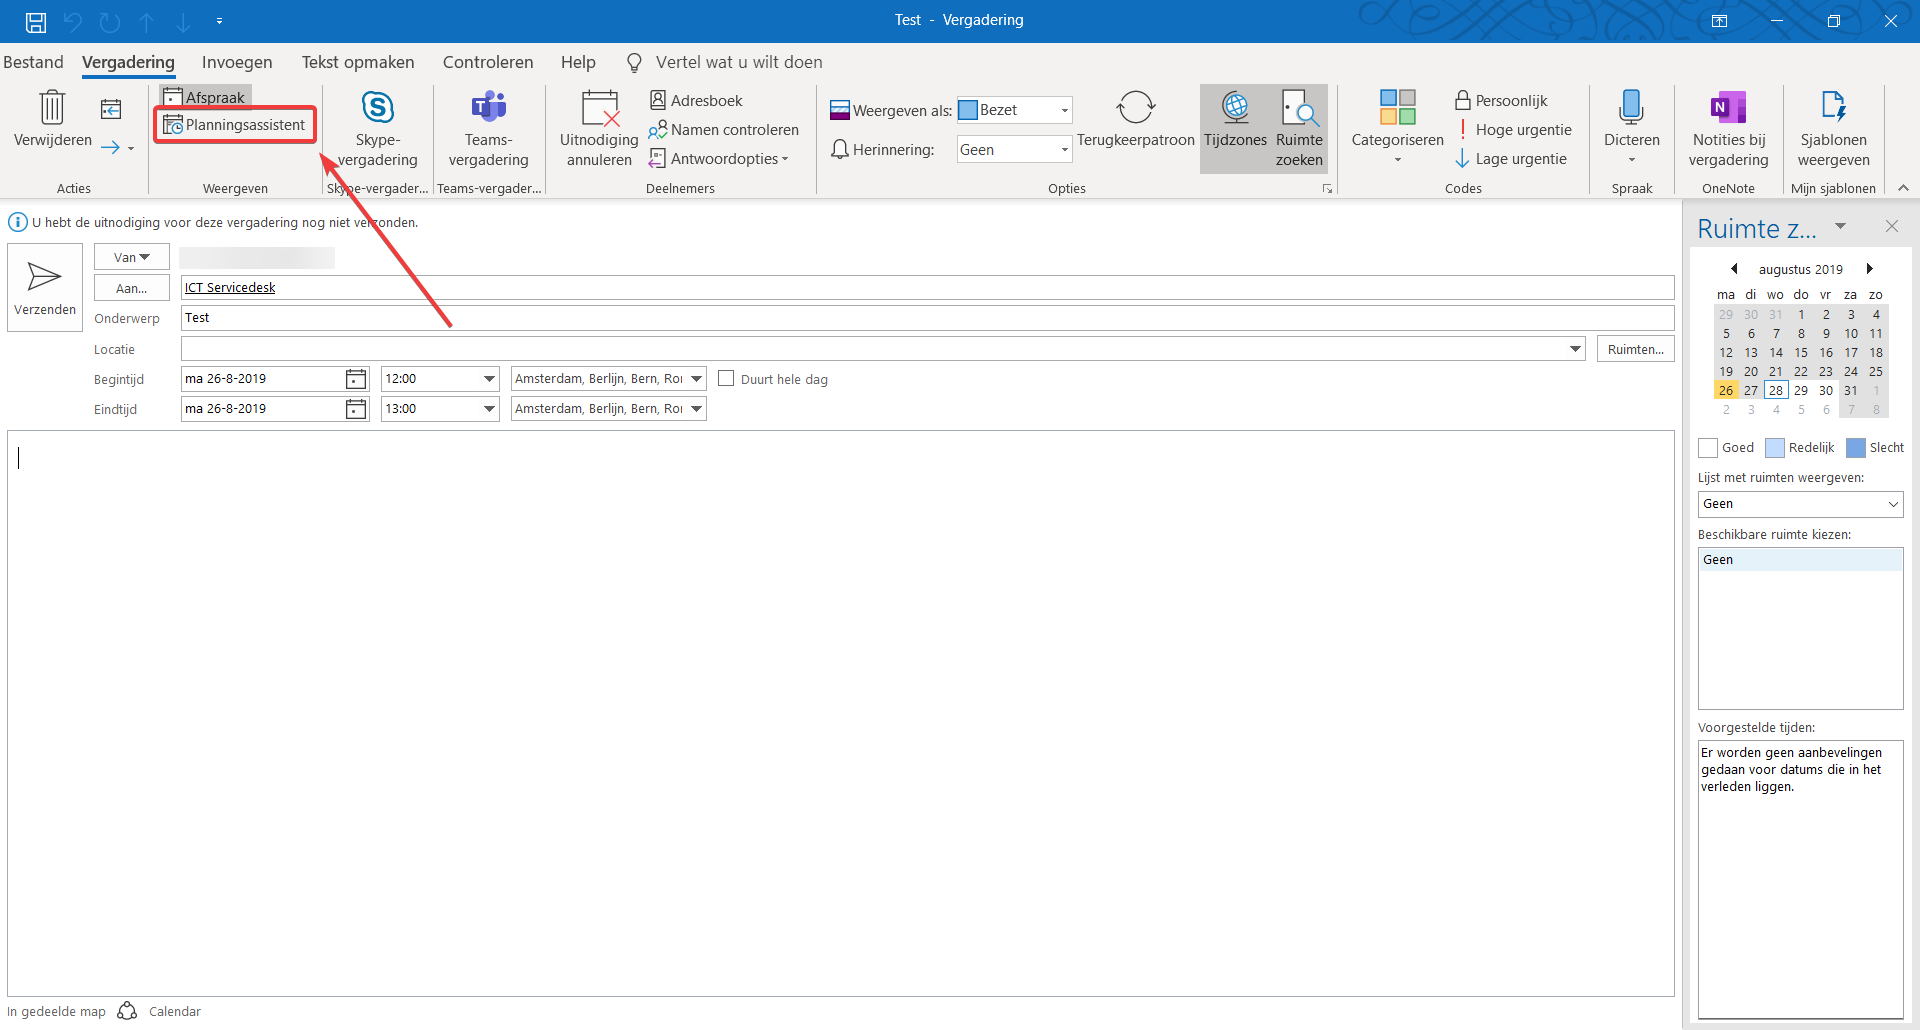
Now it’s time to find available rooms.
- Click Scheduling Assistant in the top left of the window
-
Step 6
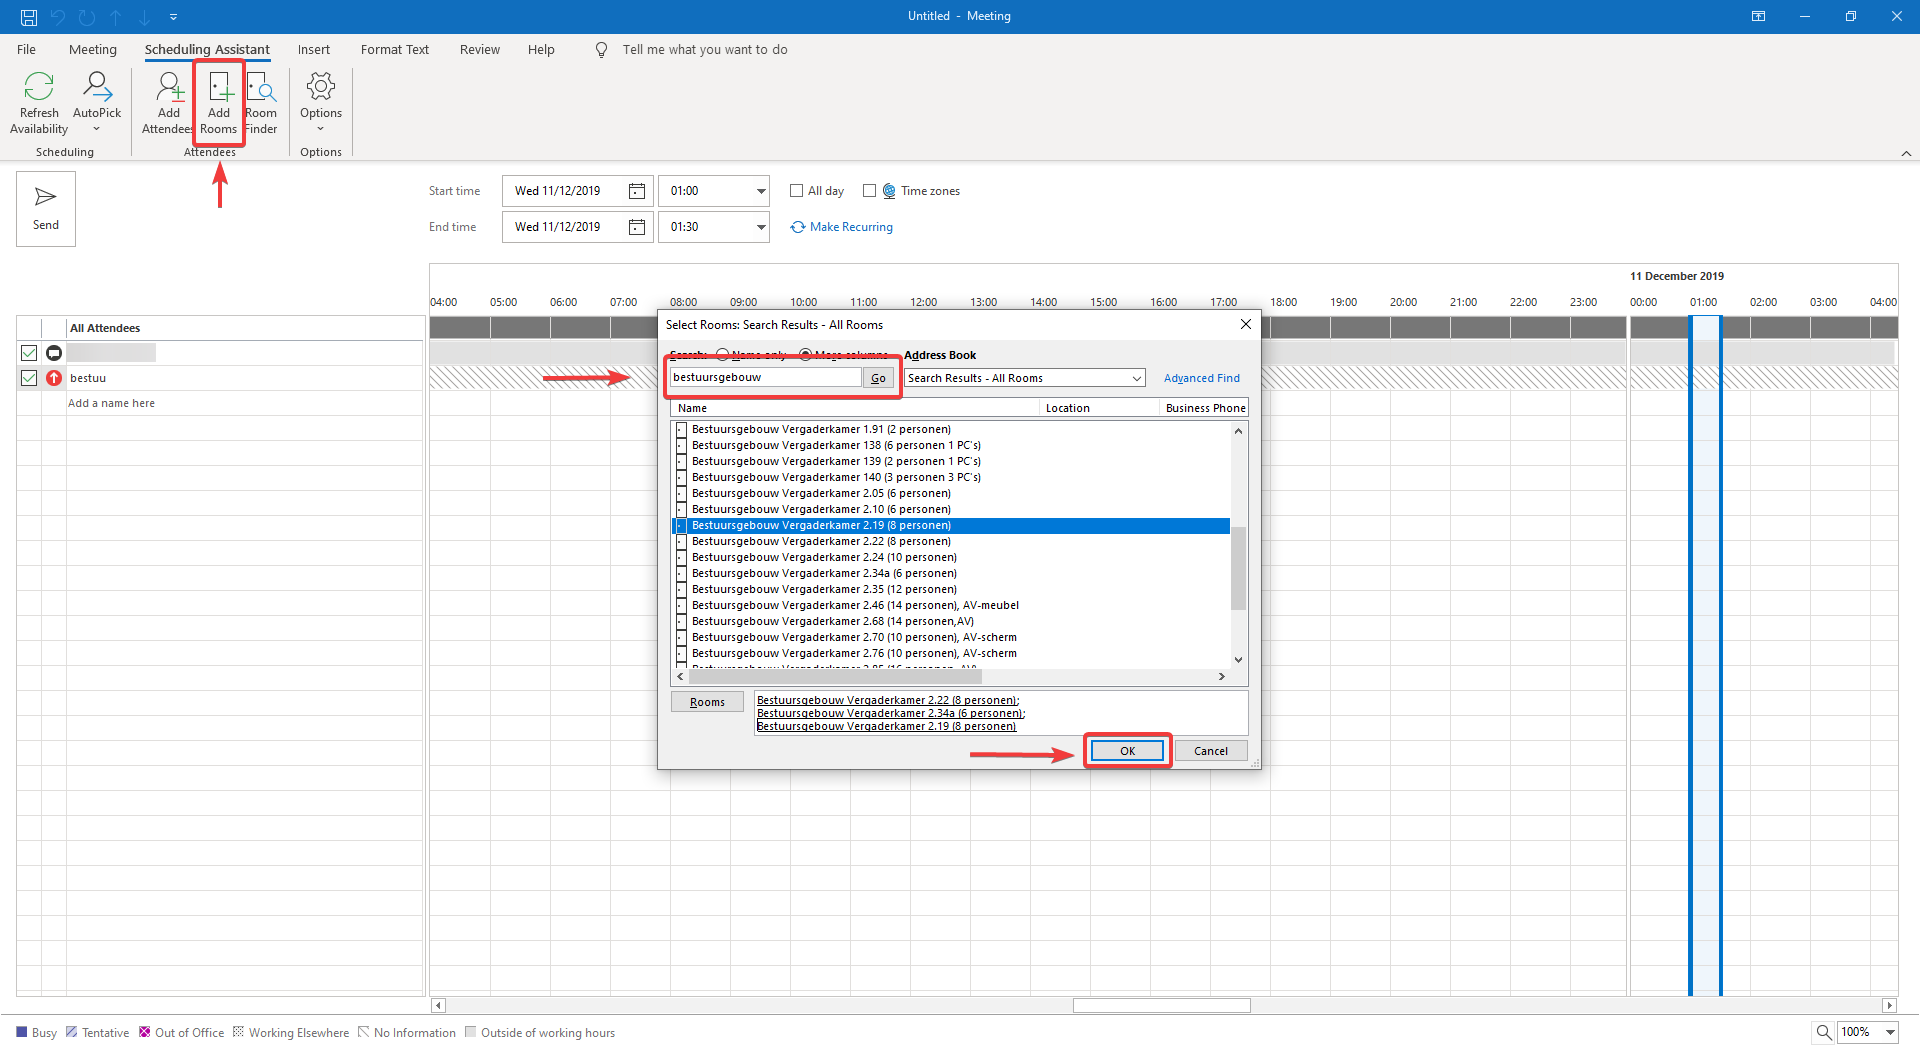
Add the meeting rooms you wish to check for availability
- Click Add rooms in the top left
- Type the building name in the search field
- Dubbel click the rooms you whish to check for availability
- Click OK when finished
-
Step 7
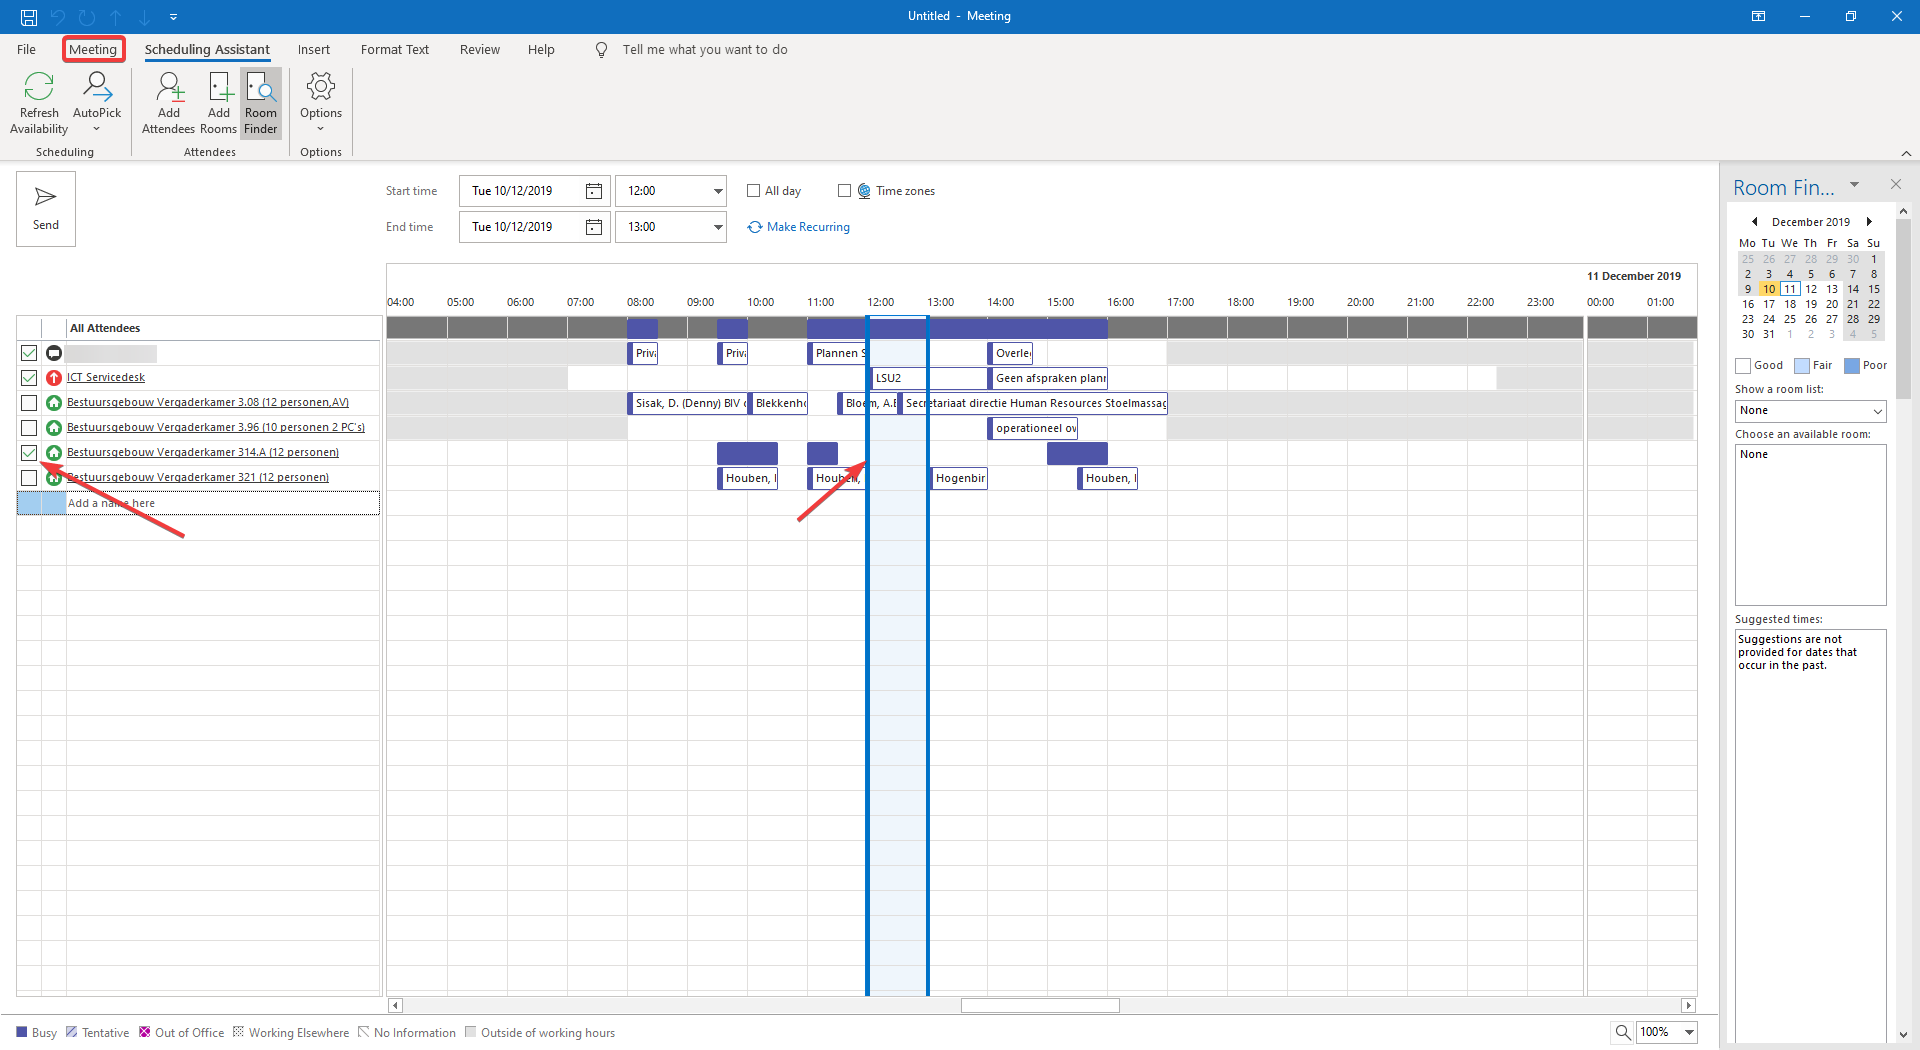
You’ll now see a list of the selected rooms and their availability.
- Keep the preffered room checked and uncheck all other rooms
- Go back to the meeting overview by clicking Meeting in the ribbon
You can now give the meeting a title and short description before sending the invitation.
Last modified: 11/12/2019


