Printers: UUBlack/UUColour printing via macOS
This manual describes how to print at the UU using your own Mac.
If you have a Solis-Mac from the UU, you do not need to follow this manual. The printers will be automatically installed.
-
If you get the notification “Hold for authentication” when printing, read the instruction below in the FAQ.
-
Step 1
Check if you are using a recent enough version of macOS (OS X version 10.10 or higher). You can check your OS version by clicking on the Apple symbol in the top left and clicking “About this Mac”.
-
Step 2
Mare sure you are connected to the wireless network Utrecht University.
-
Step 3
Download the Xerox printer program.
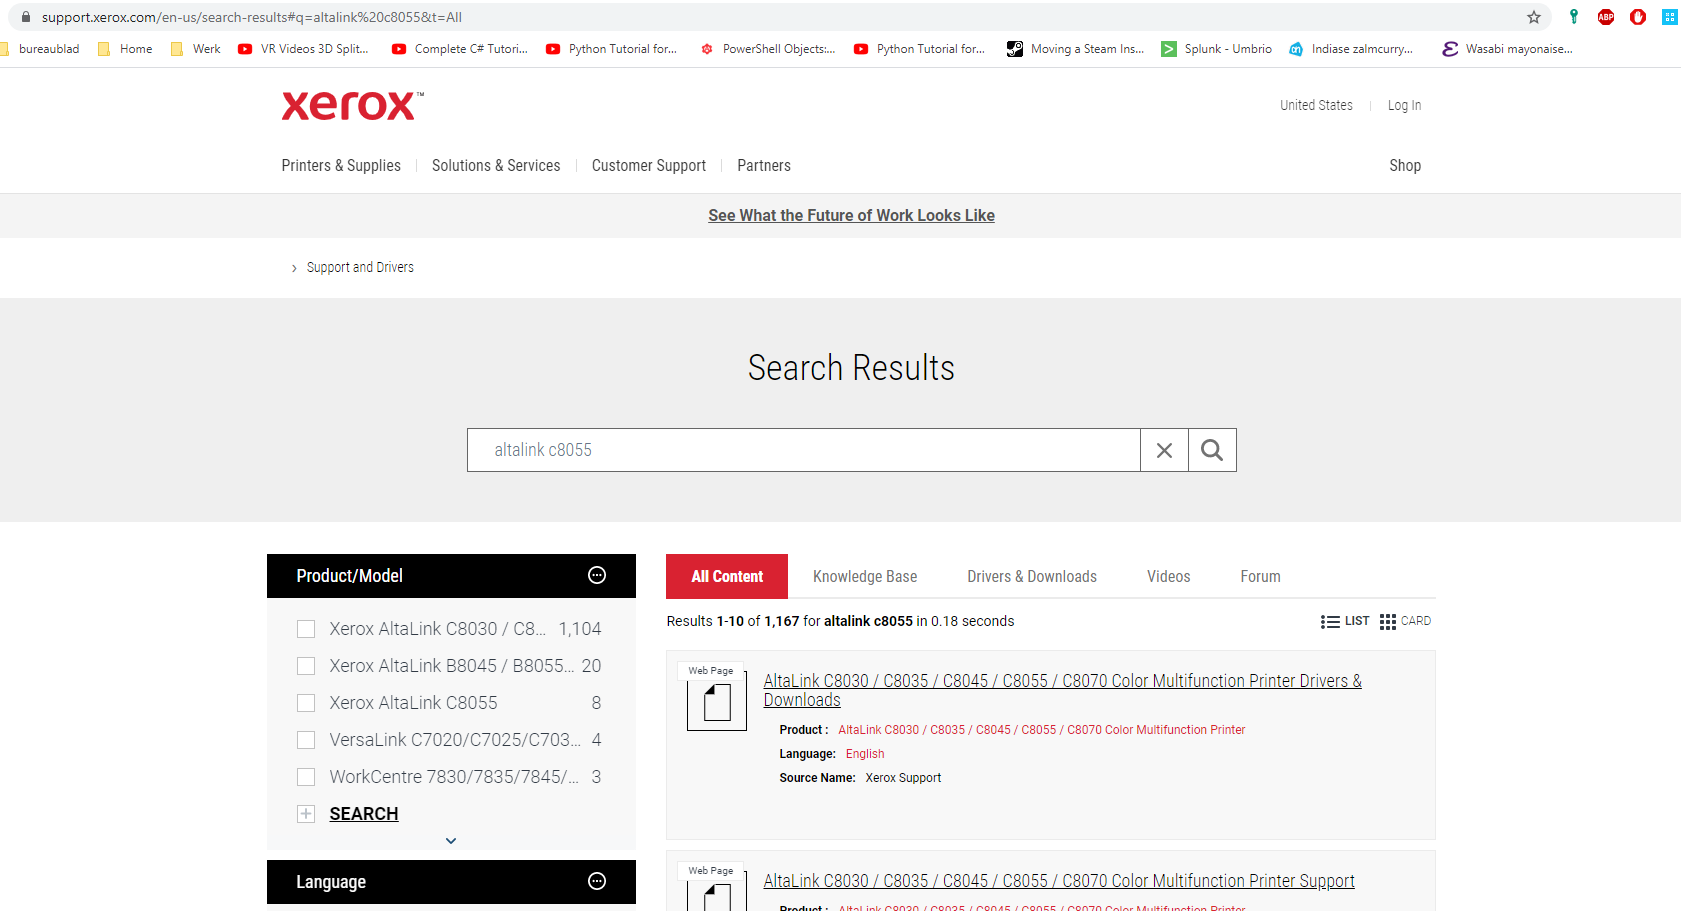
Do this by going to the Xerox website and searching for “Altalink C8055”.
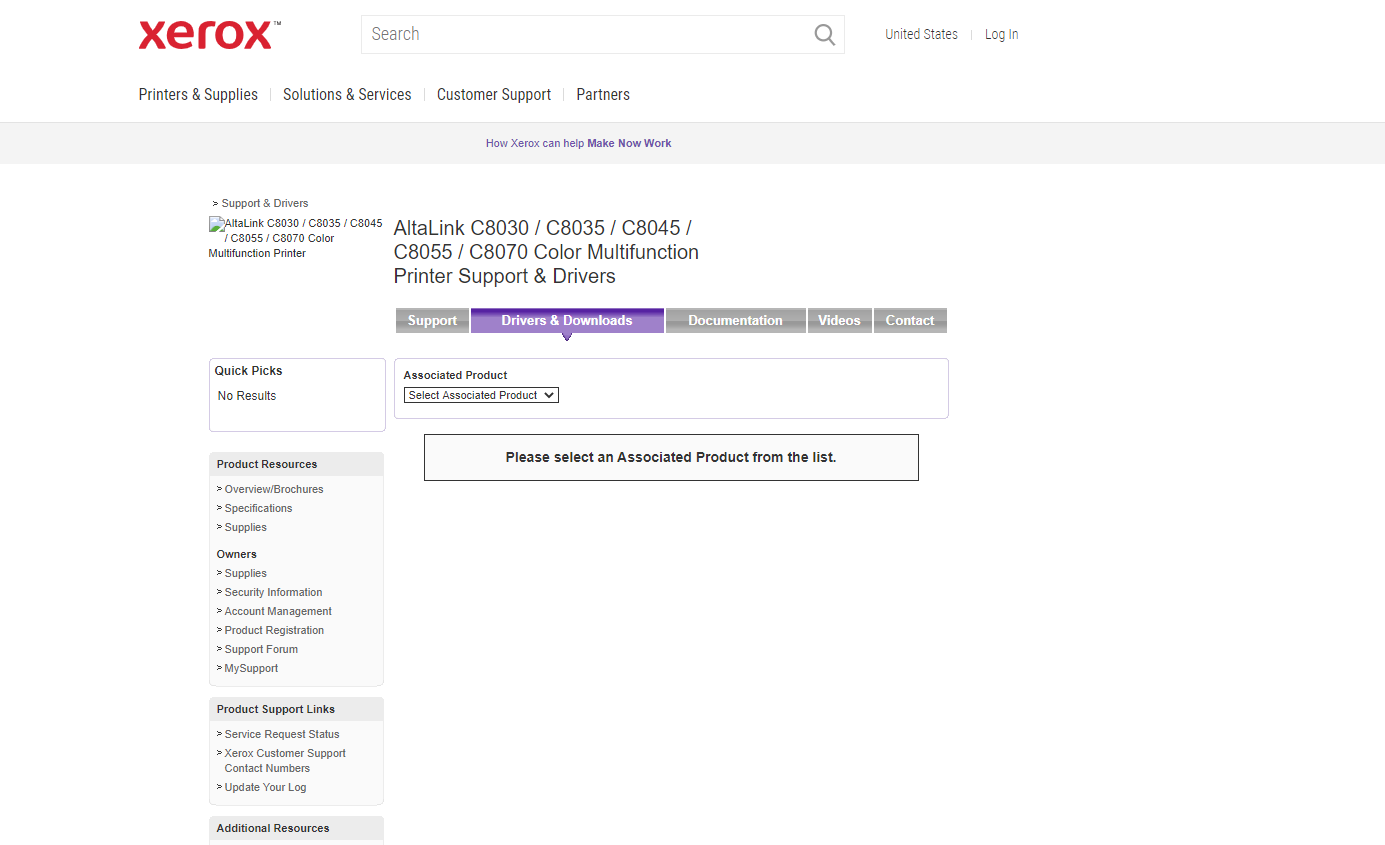
Then click the link to go to the Altalink Cxxxx Multi functional Printer Drivers & Downloads.
-
Step 4
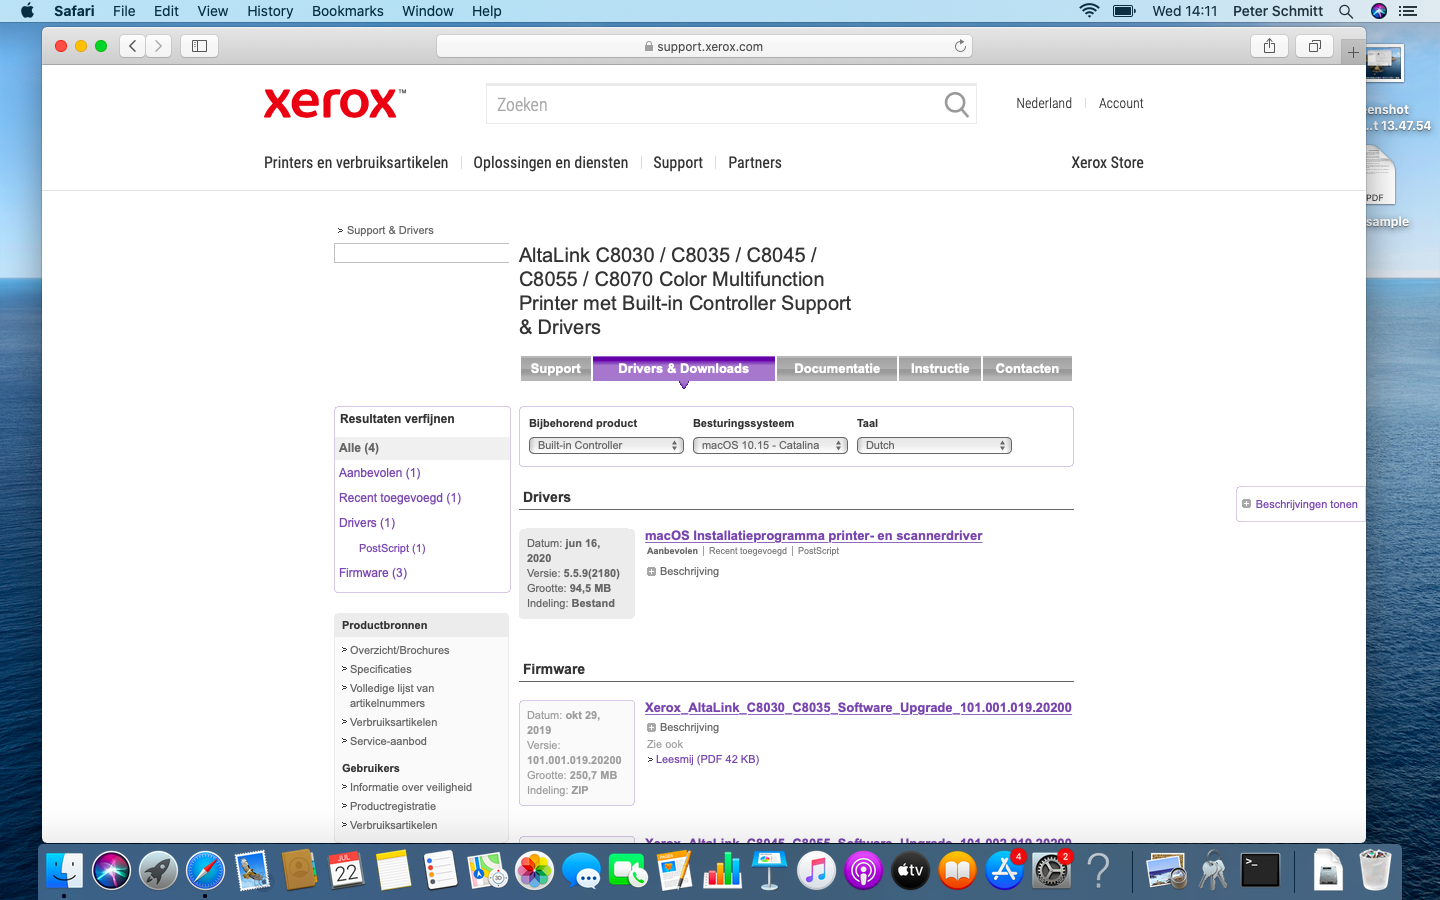
Click on the dropdown menu at “Associated Product” and choose the option “Build in Controller”. Then choose your Operating System and preferred language.
-
Step 5
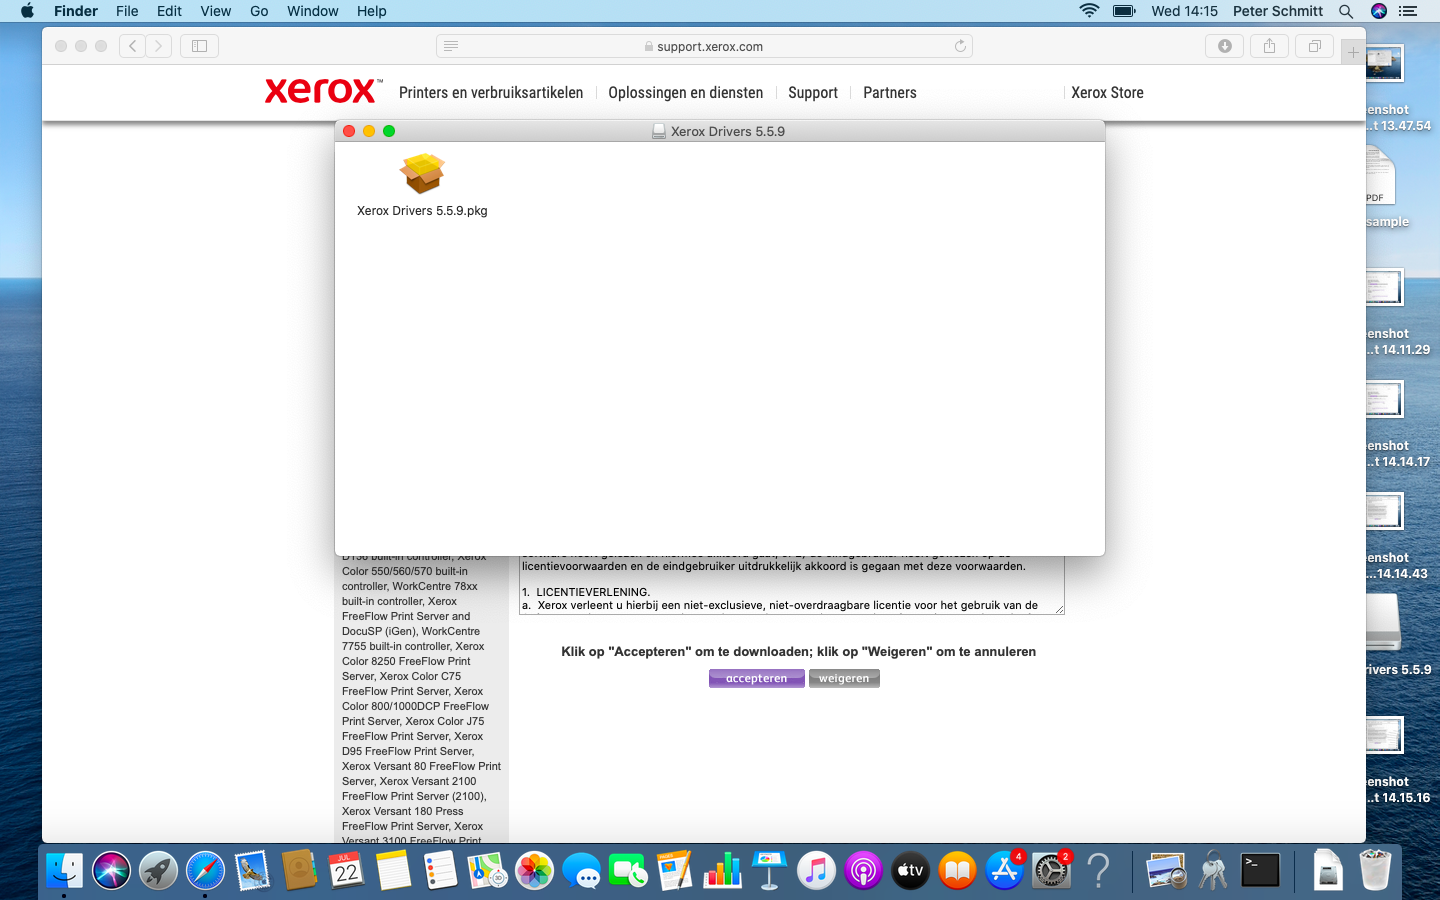
Click on the “Mac OS Installatieprogamma printer- en scannerdriver”. Click “Accept” at the bottom. The file will now start downloading.
-
Step 6
Once the download has finished, click on the “Downloads” symbol in your dock (next to the trash can).*
Then click on the XeroxPrintDrive.
* No downloads in your dock? Then double click in your browser on the file you just downloaded: “Xerox Print Driver”.pkg.
-
Step 7
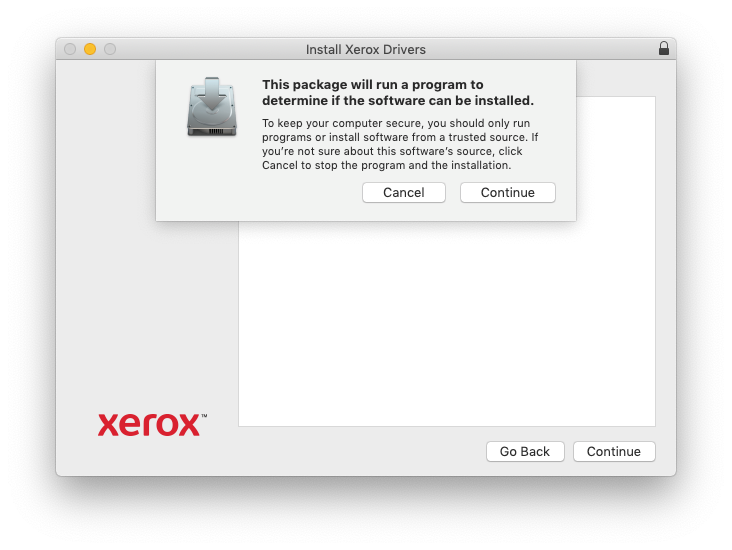
The installation process will start (see image on the left).
- Click “Continue” 3 times
- Click “Agree”
- Click “Install”
-
Step 8
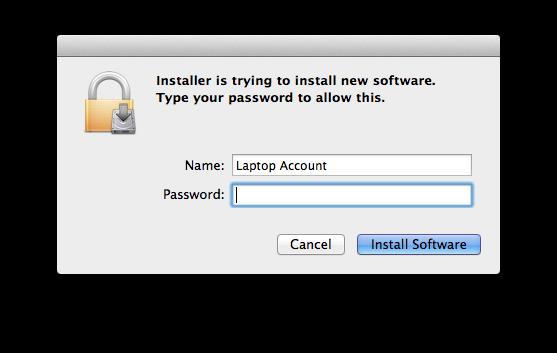
You will see this window.
Enter the same username and password you use on your laptop. You have to have installation rights on your laptop.
Click on “Install Software”, the driver will now be installed.
-
Step 9
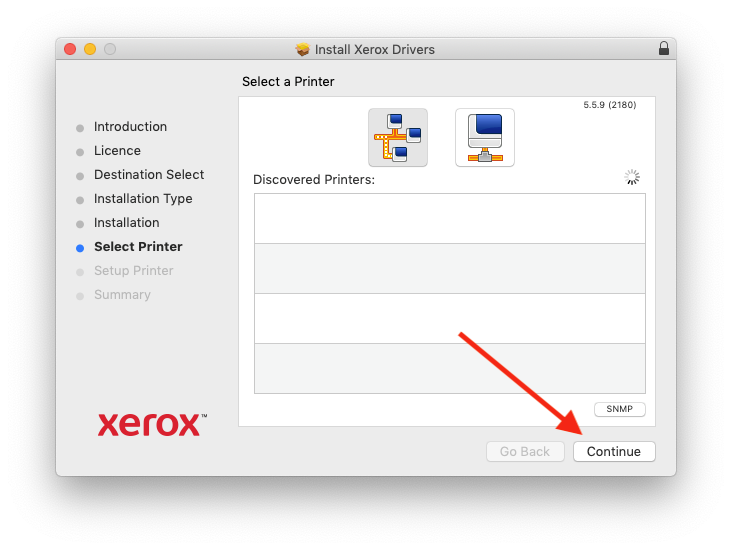
Please note: the printer(s) will not be in the list yet.
Click “Continue” to complete the installation. Then click “Continue” again and then on “Close”.
You will get asked whether you want to throw away the installation file. You no longer need this file.
-
Step 10
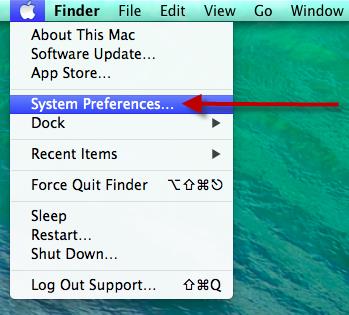
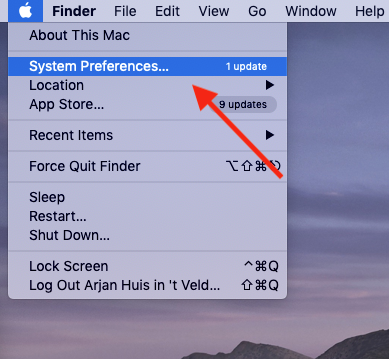
Click “System Preferences…” in the top left.
-
Step 11
Click “Printers & Scanners”.
-
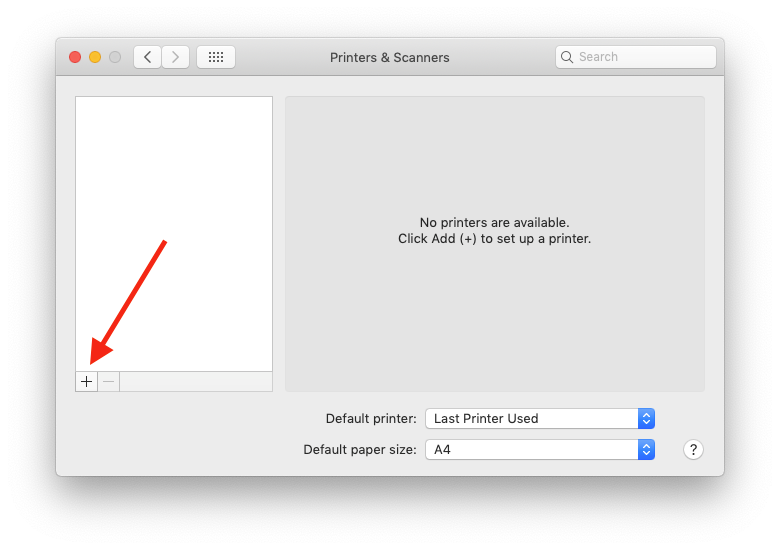
Step 12
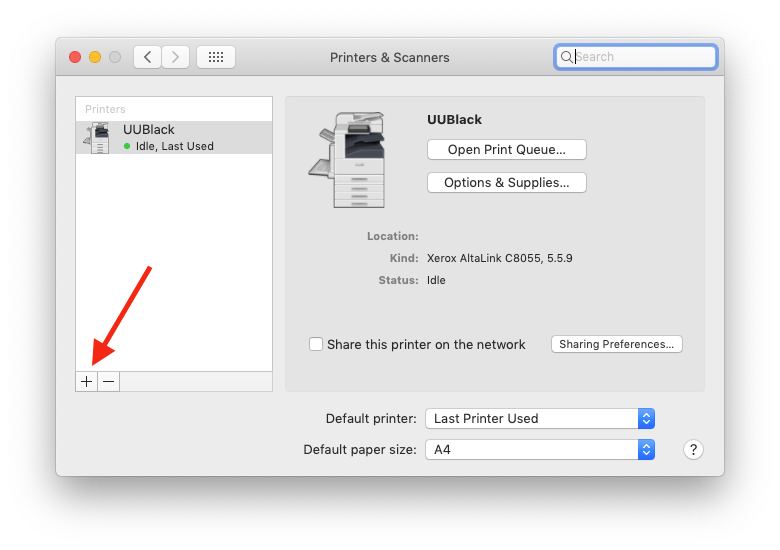
Click the ‘+’ symbol to add a printer.
-
Step 13
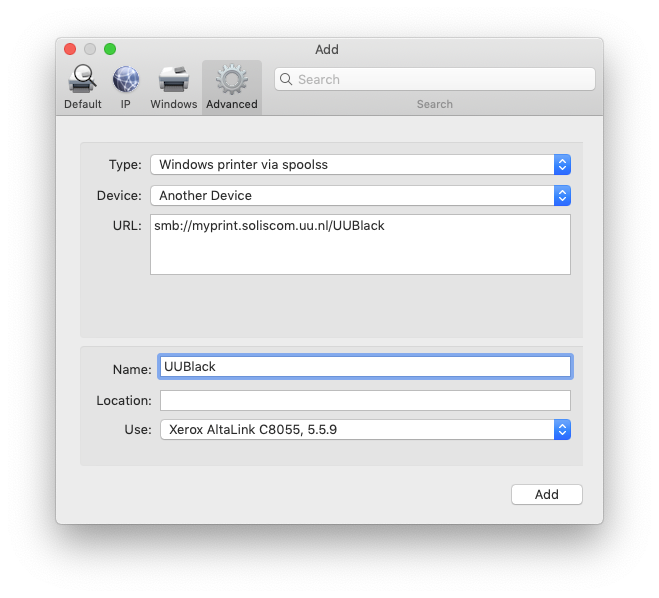
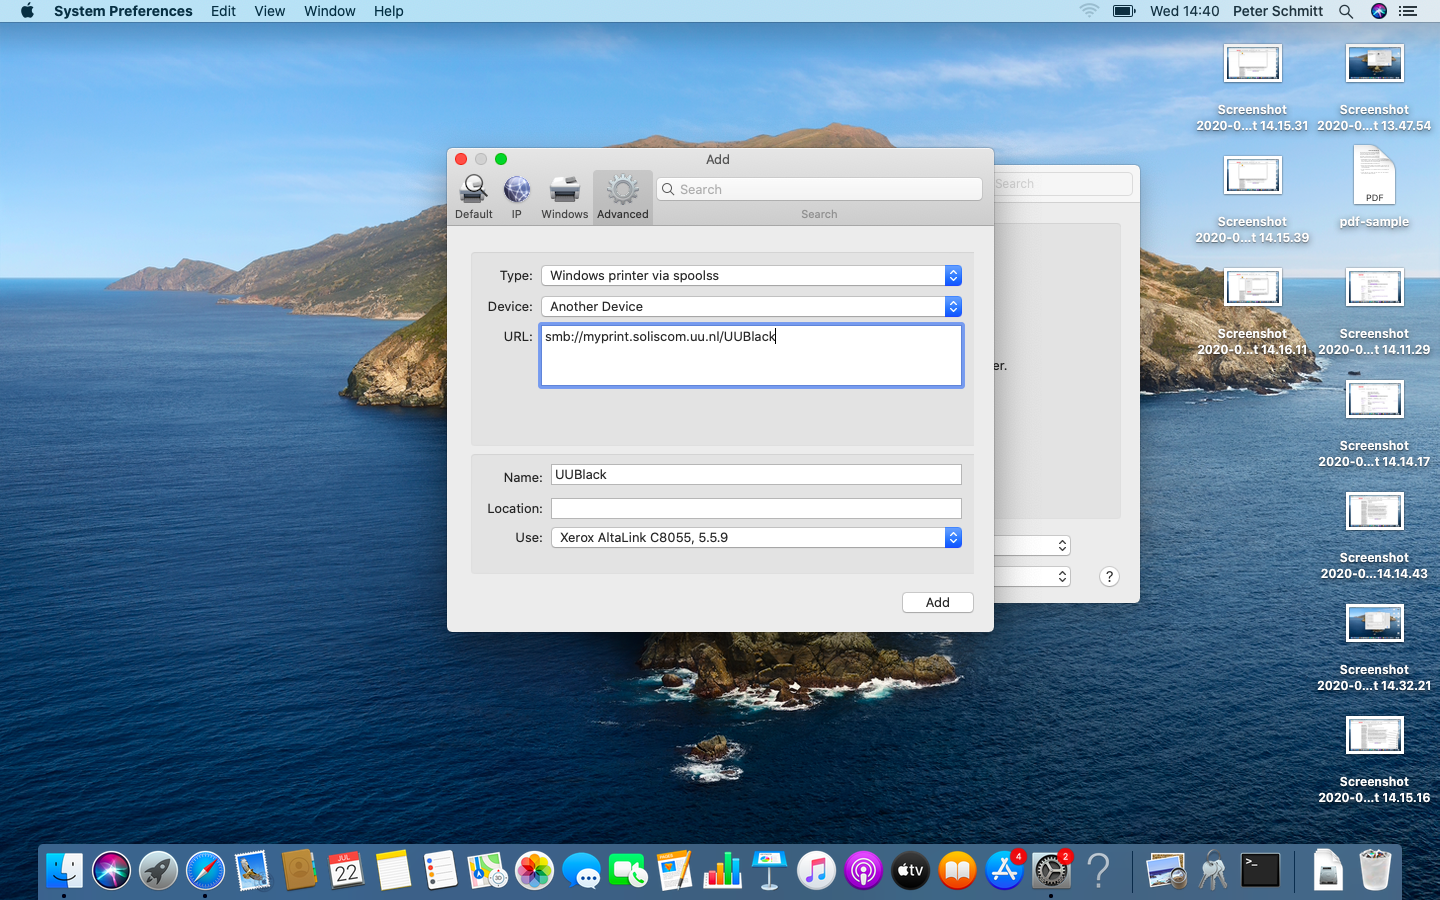
Click “Advanced” and select or enter the following information:
Type: “Windows printer via spoolss”
URL: “smb://myprint.soliscom.uu.nl/UUBlack”
Name: “UUBlack”See the FAQ below if the “Advanced” button isn’t visible.
-
Step 14
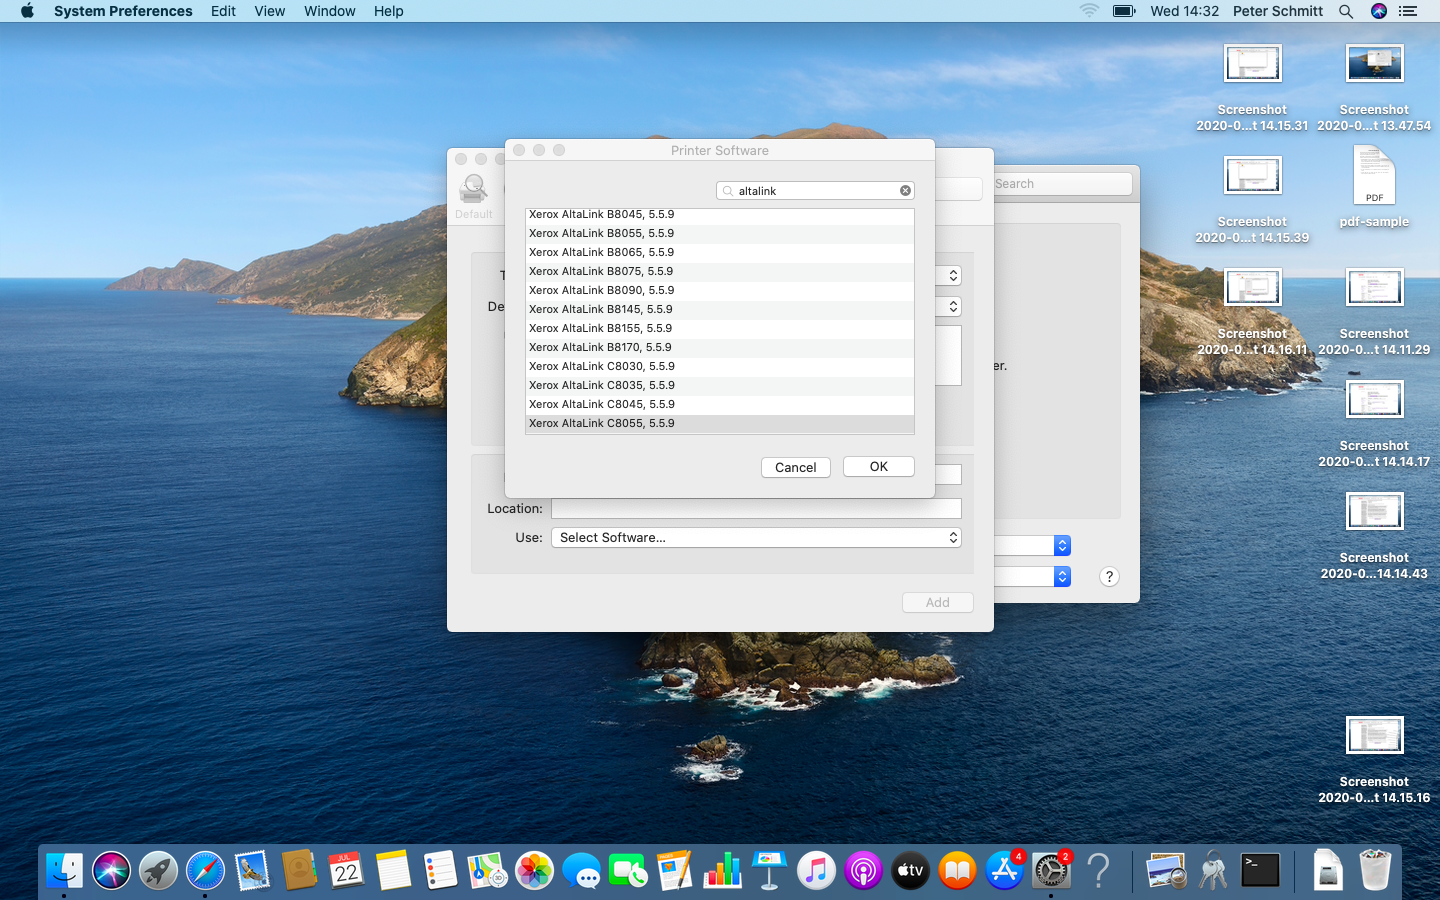
At “Choose a driver” choose “Select Software” and go to “Xerox Altalink C8055” and click “OK”.
-
Step 15
Click “Add” at the bottom.
-
Step 16
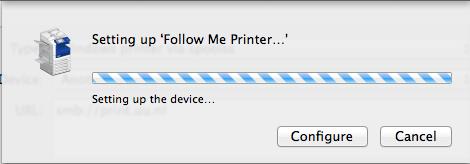
The printer is now installing.
Wait until this window disappears and do not press the buttons below.
-
Step 17
You will see the installed printer on the left (UUBlack – idle). Click on it once.
Then click “Options & Supplies”.
-
Step 18
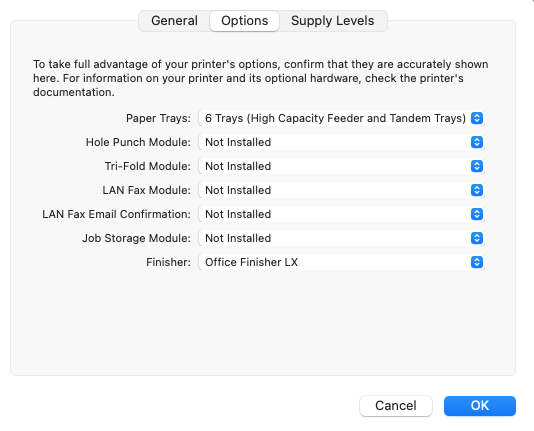
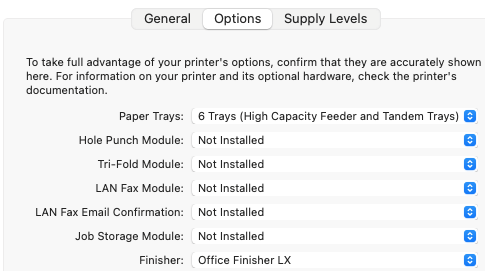
- Click the tab “Options”.
- Choose Paper Trays: “6 Trays (High Capacity Feeder and Tabdem Trays)”
- Click “Ok”.
NB: The Xerox printer model C8055 had 6 trays, other models can have less.
-
Step 19
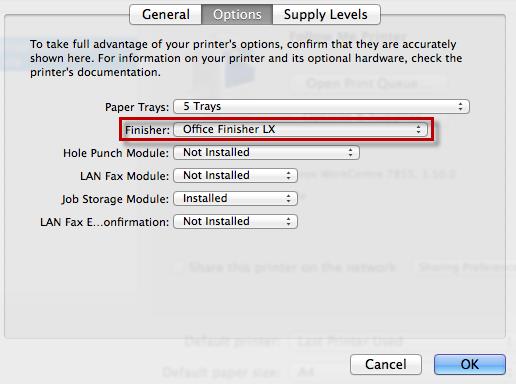
At Finisher choose “Office Finisher LX” and then click “OK”.
Close the window (Printers &Scanners).
-
Step 20
The next steps are meant to configure the printer.
Microsoft Word is used as an example of how to do this. If you do not have Word, use another application like Notepad for example.
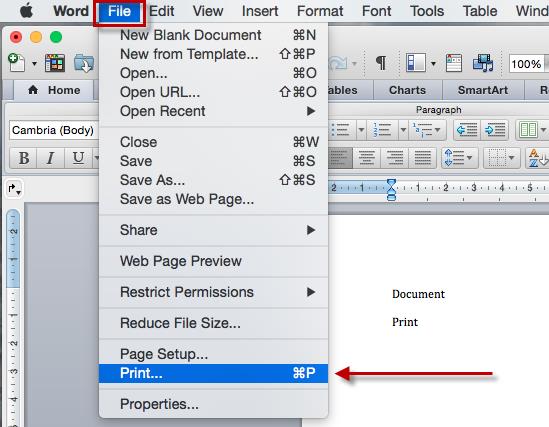
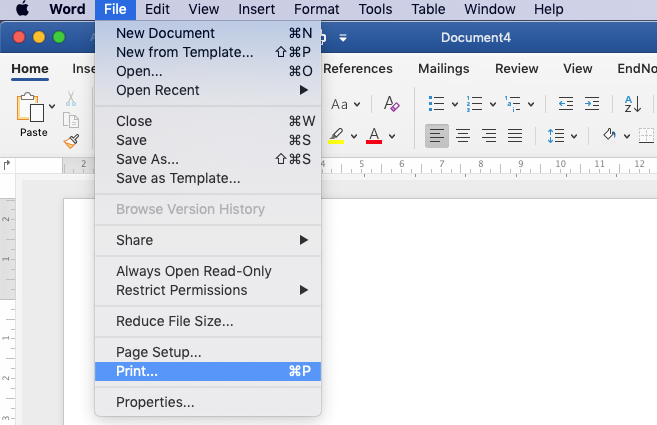
Open Microsoft Word and open an empty document. Click “File” at the top and then “Print..”.
-
Step 21
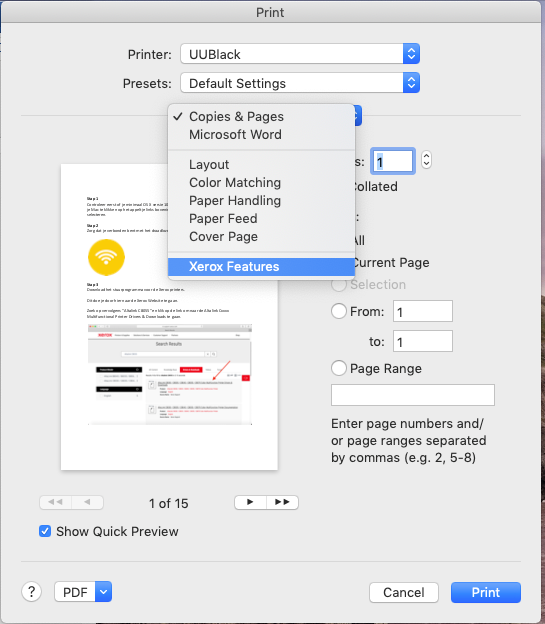
Click “Copies & Pages” and select “Xerox Features”
-
Step 22
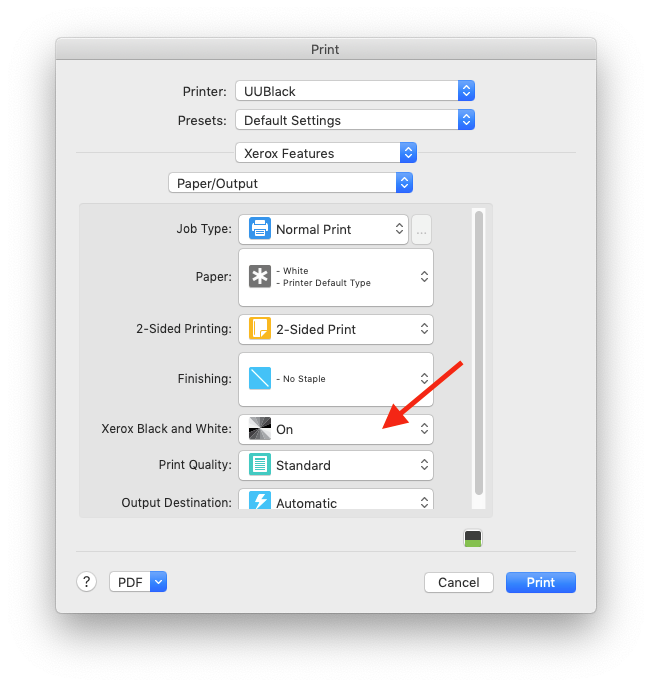
Select the option “On” for the field “Xerox Black and White”.
Now click “Print”.
-
Step 23
Enter your Solis-id and password.
Please note: your username is your Solis-id added to ‘soliscom.uu.nl\’, so: soliscom.uu.nl\solis-id (for example soliscom.uu.nl\2308238).
Then Click “OK”.
Tip: Select “Remember this password in my keychain”. Then you don’t need to enter your password every time you want to print something.
-
Step 24
Click on “System Preferences” again to add the colour printer.
-
Step 25
- Click “Printers & Scanners”.
-
Step 26
Click the + to add another printer.
-
Step 27
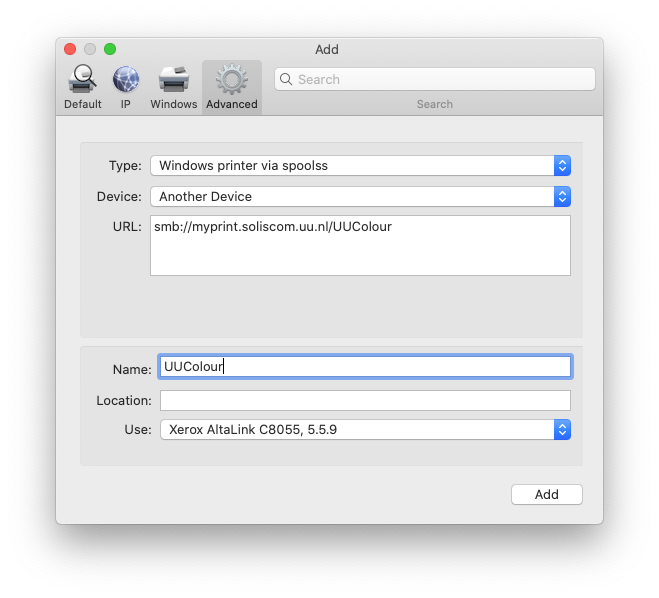
Click “Advanced” and select/enter the following information:
- Type: “Windows printer via spoolss”
- URL: “smb://myprint.soliscom.uu.nl/UUColour
- Name: “UUColour”
-
Step 28
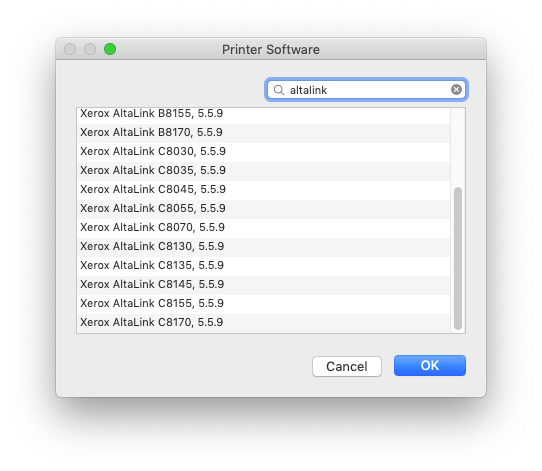
For “Choose a driver” choose “Select Software”and then select “Xerox Altalink C8055” and click “OK”.
-
Step 29
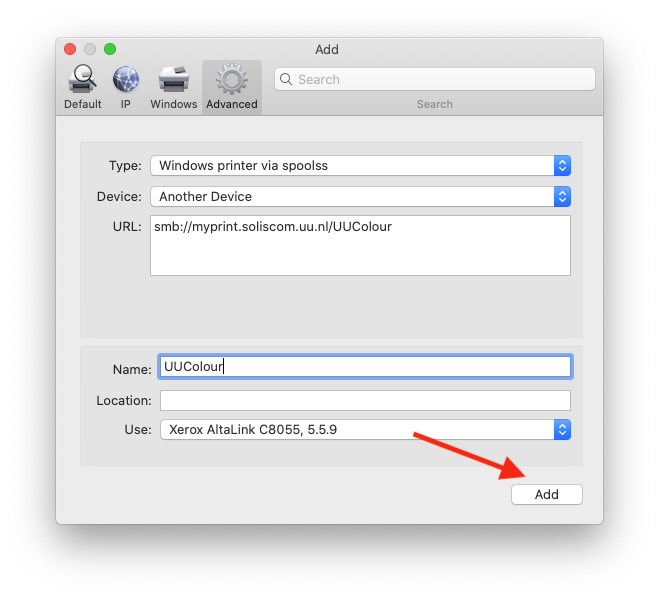
Click “Add”.
-
Step 30
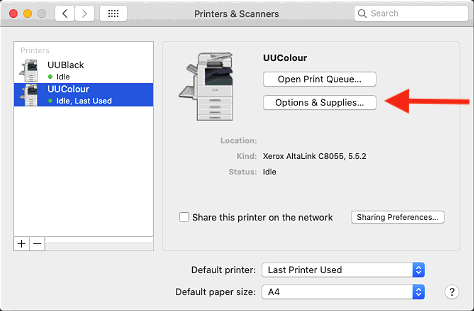
You will see the installed printer on the left (UUColour – idle). Click on it once and the click “Options and Supplies”.
-
Step 31
- Click the tab “Options”.
- Choose Paper Trays: “6 Trays (High Capacity Feeder and Tabdem Trays)”
- Choose “Office Finisher LX” next to Finisher.
- Then click “OK”.
NB: The Xerox printer model C8055 had 6 trays, other models can have less.
-
Step 32
The next steps are meant to configure the printer.
Microsoft Word is used as an example of how to do this. If you do not have Word, use another application like Notepad for example.
Open Microsoft Word and open an empty document. Click “File” at the top and then “Print..”.
-
Step 33
Enter your Solis-id and password.
Please note: your username is your Solis-id added to ‘soliscom.uu.nl\’, so: soliscom.uu.nl\solis-id (for example soliscom.uu.nl\2308238).
Then Click “OK”.
Tip: Select “Remember this password in my keychain”. Then you don’t need to enter your password every time you want to print something.
-
Step 34
The printers have now installed completely.
When you want to print something you can now choose between UUColour and UUBlack.
-
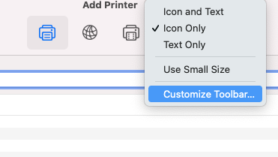
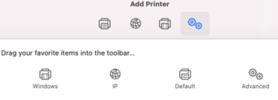
In the area of the “Add Printer” toolbar, next to the other icons, press Control + right-click, select “Customize Toolbar”. Drag the “Advanced” icon to the toolbar “Add Printer”. Press “Done”.
Sometimes you will get this notification when you’ve changed your password. MacOS remembers your old password. You will have to remove this first. Do the following:
- Go to “GO” in the finder at the top and choose “Utilities”:

Then click “Keychain Access”:

Search for “Follow Me Printer” (or the name you’ve given the printer during installation) and right click on it. Then choose “Delete “Follow Me Printer” (this only removes your credentials, not the printer).

Confirm by clicking “Delete” .

Now go to Word (for example) and print something. You will be asked to log in again. Enter soliscom.uu.nl\solis-id as your username and you password. Choose “Save my credentials”.
Last modified: 20/04/2023


